This is a quick post on a simple display, the Hitachi HD44780 aka LCD 1602. Doesn't look like much but it sure is handy, especially in the engineering prototype phase of your project. Say you've built yourself an automation that does a certain job. You've etched a PCB, soldered all the parts and even got a decent looking box to contain it. Congrats! Now you have to test it on the field, thus carry it around with you. You could continue serial logging its parameters from your PC but you'd also need to bring that along. Let's admit, all this shebang just won't do. For such cases and others the 16x2 or its 16x4 bigger cousin jump into action.
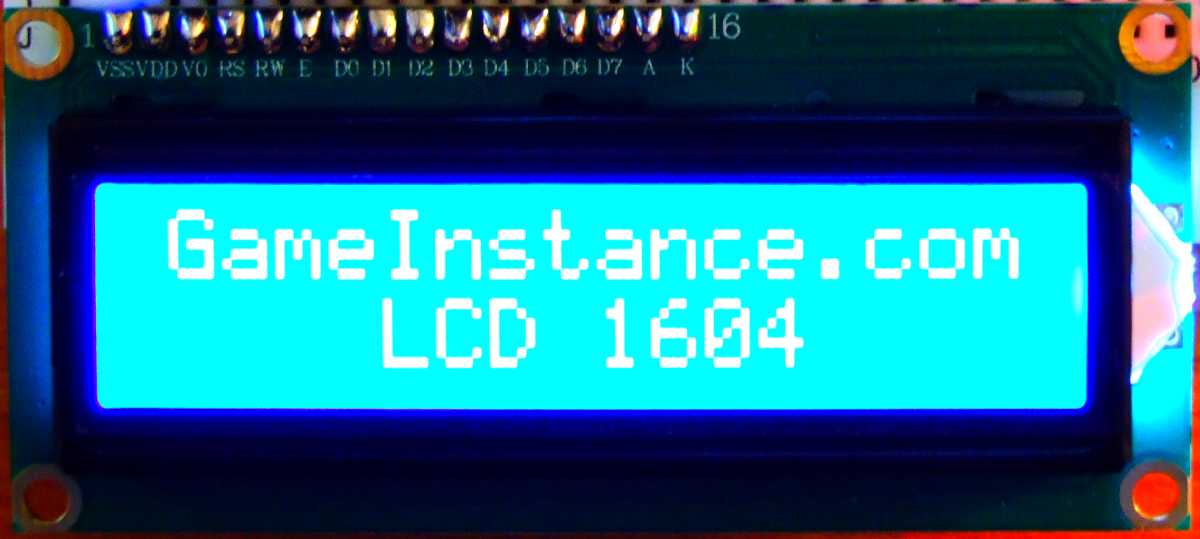 LCD 1602, a 16x2 chars text display, displaying its bigger cousin's name
In brief
This will summarily describe what each pin does and how to connect them. The LCD1602 has a wide header, 16 pins, but luckily not all need be connected. Among them, there's an eight bit data bus that can be reduced to four bit, D4 - D7, and the Arduino's LiquidCrystal.h encourages the use of that simple version. Then there's the VSS that takes up to 5 volts and VDD that should be connected to the ground point. One could also remove the A and K connections, disabling the LED backlight but then the text will be almost invisible. The VO sets the LCD's contrast given an input voltage from 0 to VSS, usually obtained through a high resistance potentiometer. The RS pin can be either HIGH or LOW and dictates whether the incoming bits represent instructions or raw displayable data. The RW pin needs to be LOW so that data can be written onto it and E is the enable pin that, obviously, enables LCD's data registers.
With no further ado, the connection schematic:
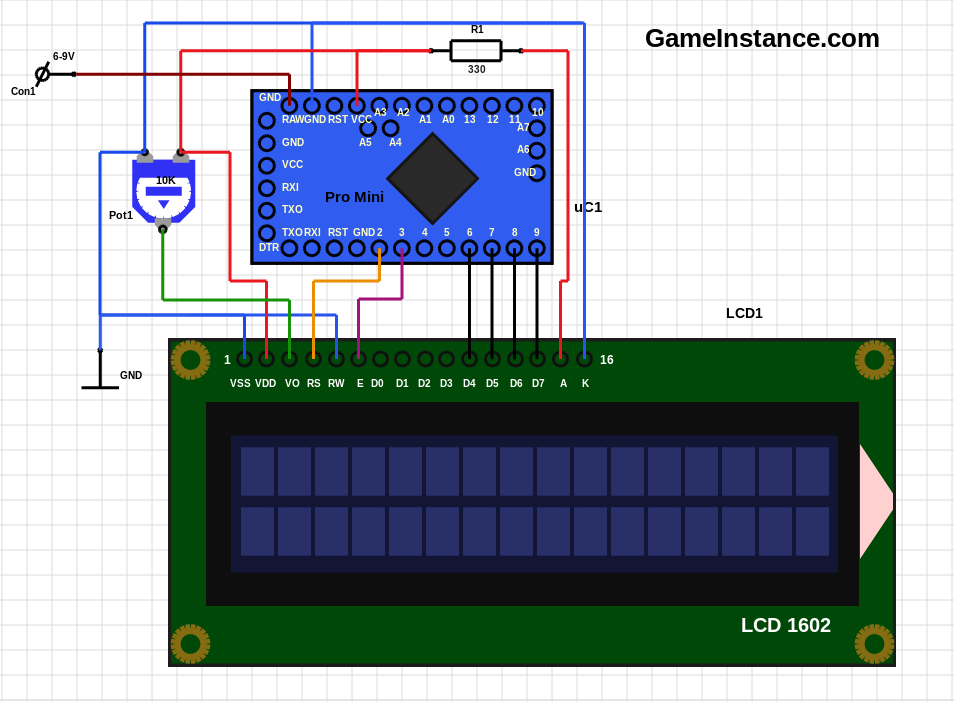 LCD1602 and Arduino Pro Mini - schematic
Connections
LCD1602 ------- Arduino
VSS ----------------- GND
VDD ---------------- VCC
VO ----------------- Pot1's wiper
RS ------------------ 2
RW ----------------- GND
E ------------------- 3
D4 ------------------ 6
D5 ------------------ 7
D6 ------------------ 8
D7 ------------------ 9
A ----- 330 Ohm ---- VCC
K ------------------- GND
The code
that goes with the setup is the simplest possible. However, it is sufficient to test the above setup. Once you got it working, you can change the logic to your liking.
#include <LiquidCrystal.h>

LiquidCrystal lcd(2, 3, 6, 7, 8, 9);

void setup() {
  // initializes the LCD with the size in chars (16x2)
  lcd.begin(16, 2);
  lcd.print("GameInstance.com");
  lcd.setCursor(4, 1);
  lcd.print("LCD 1604");
}

void loop() {
  //
  delay(1000);
}
There's not much more to be said. Except maybe that the above configuration can turn into a small project in itself. A light and portable serial logger that can be attached to any device accepting serial connections. It may have few buttons for selecting the connection speed, data scrolling and acquisition freeze. But that, in a future article.